Theme Requirements
You need some requirements to install and use the Varmo theme.
max_execution_time 300memory_limit 128Mpost_max_size 32Mupload_max_filesize 32Mmax_input_vars 2000
please use Strong passwords and the latest version of WordPress and all plug-ins keep updated.
Theme Installation
Unpacking the theme
When you download the theme from Themeforest, you will get an archive file in the .zip extension. You need to unzip that archive file. The Varmo.zip file is the Installable WordPress Theme and what you need to use to get the theme installed. Please see the following steps that how to install Varmo.
Our theme package contains the main theme, child theme documentation, and demo contents.
To install the theme, you need to have a working version of WordPress installed on your server first. Check out this guide.
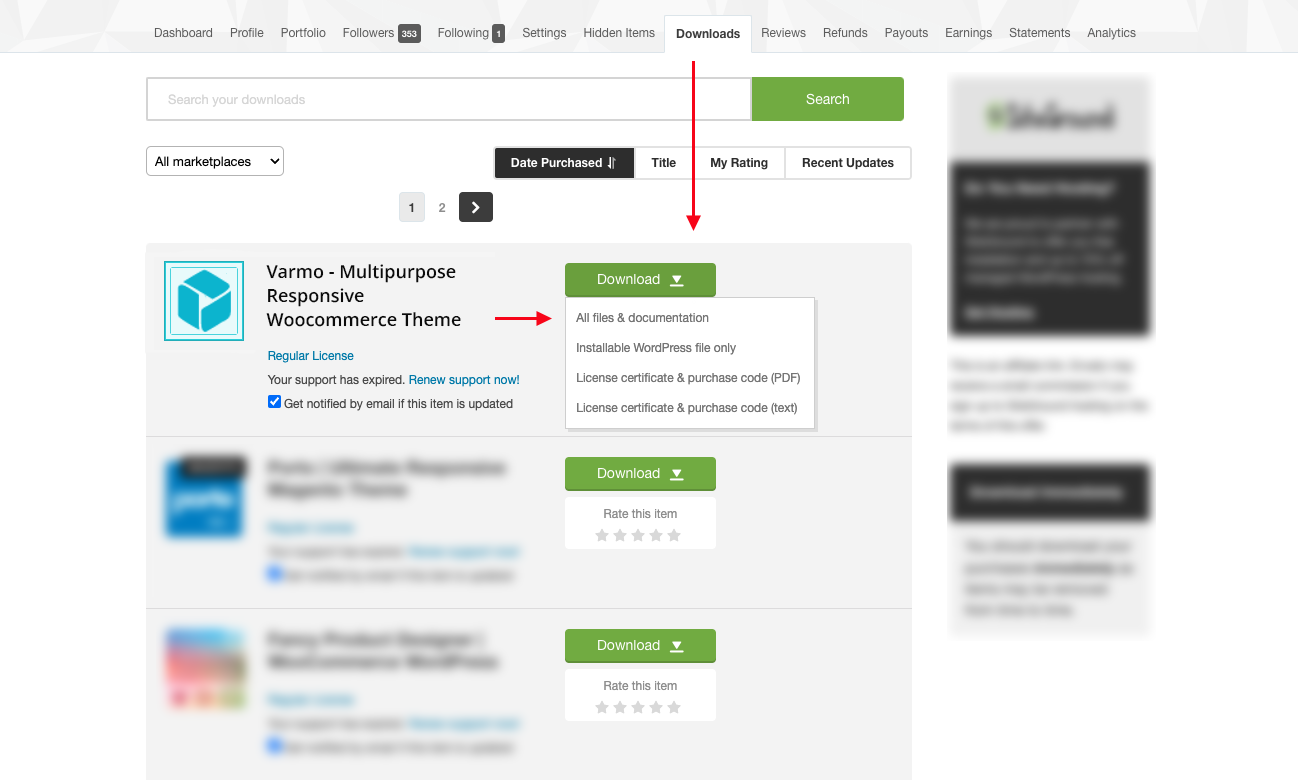
- Login to your WordPress Dashboard.
- Navigate to Appearance > Themes. Click the Add New button, located at the top of the screen, or Add New theme
- Click on the Upload Theme button at the top of the screen.
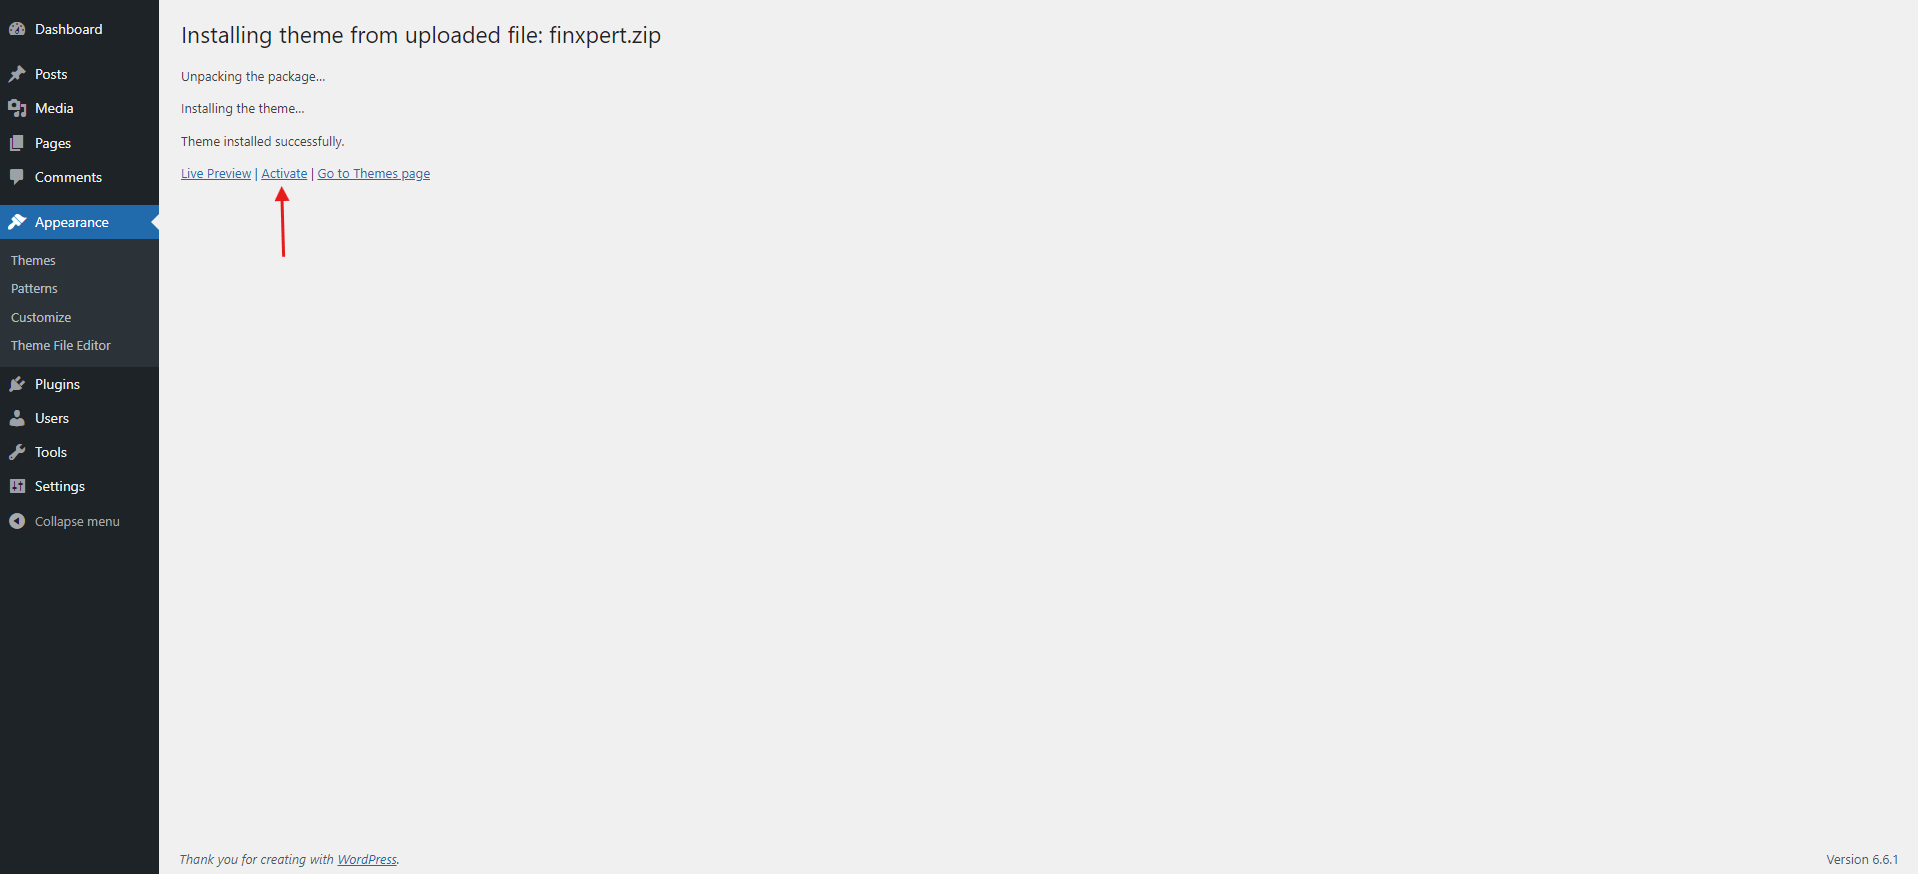
- Choose varmo.zip file and click on Install
- Active the theme after it is completely uploaded.
There are 2 ways to install the theme:
- Via FTP:
- Log into your web server with FTP client software.
- Unzip the
Varmo.zip file and ONLY use the extracted /Varmo theme folder.
- Upload the extracted
Varmo theme folder into /wp-content/themes.
- Navigate to the Appearance > Themes tab and activate the theme.
- Via WordPress admin panel:
- Log into the WordPress admin panel.
- Navigate to Appearance > Themes and click on Add New and Upload Theme.
- Select the
Varmo.zip folder and click the Install Now button.
- After the successful installation, click on the Activate or navigate to the Appearance > Themes and click onActivate button to activate the newly installed theme.
Attention! If you need to make changes in the theme’s templates, styles, or functions, we recommend installing a child theme and activate before the demo data import. Please see the Child Theme section for more information.
Plug-ins Installation
Below is the list of the plug-ins that come included into the theme.
All these plug-ins can also be installed from the WordPress.org repository and Theme plugins.
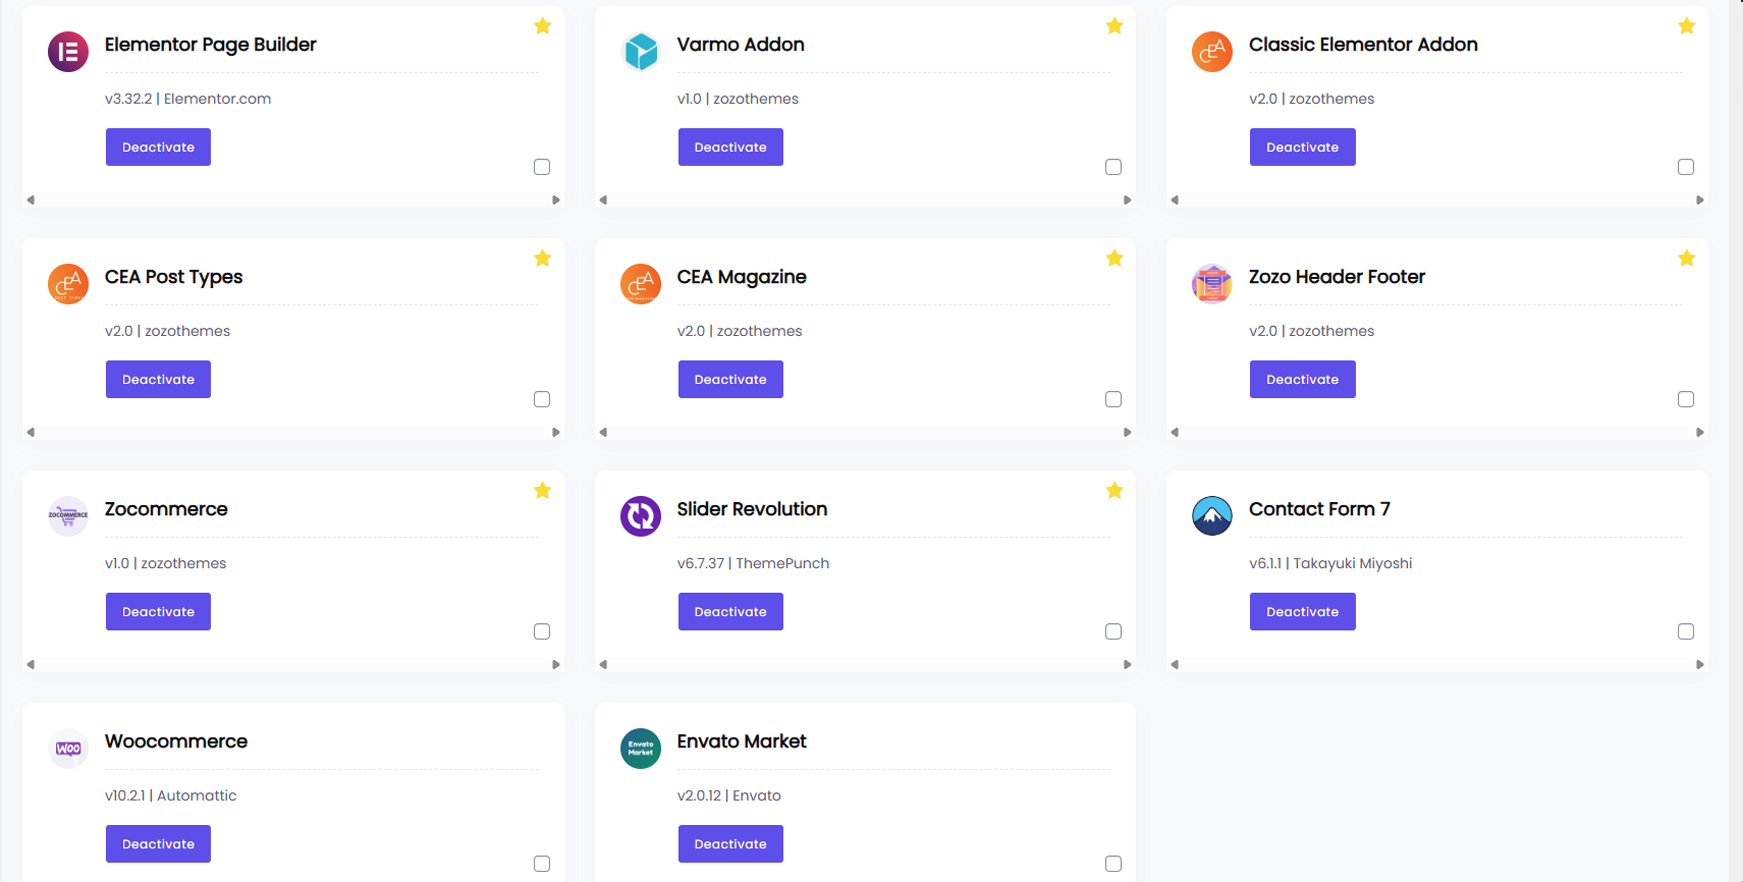
- Varmo Core (required)
- Elementor Page Builder (required)
- Classic Elementor Addons Pro (required)
- Slider Revolution(required)
- CEA Post Types(required)
- CEA Magazine(required)
- Zozo Header Footer(required)
- Contact Form 7
- WooCommerce
- Envato Market
To make the site look exactly as on the Our demo, you must need to install all of the recommended plug-ins:
- After the installation/activation of the Varmo theme, Go to WordPress Dashboard >> Varmo >> Theme plugins here you can install all of our recommended plugins.
- Bulk Select -
All plugin installs and activations can be done together using this option.
- It can also be installed and activated separately.
Also, deactivate all plugins using this option.
Page Builder
All existing demo pages and layouts are built using Elementor Page Builder and should be customized using Elementor Page Builder only.
PLEASE NOTE! We recommend Please use one-page builder per page or post.
Child Theme
A child theme allows you to change small aspects of your site’s appearance yet still preserve your theme’s look and functionality. To understand how child themes work it is first important to understand the relationship between parent and child themes.https://developer.wordpress.org/themes/advanced-topics/child-themes/
IMPORTANT! Install the child theme before importing the demo data. Otherwise, all of your theme options will be reset.
A child theme is installed the same way you install a parent theme. Locate the Varmo-child.zip file in the theme package and upload it via the WordPress admin panel. or you can unzip it and upload via FTP (see main theme installation.
Using a Child Theme
So here you can modify default functions with funtions.php and overwrite style CSS with style.css
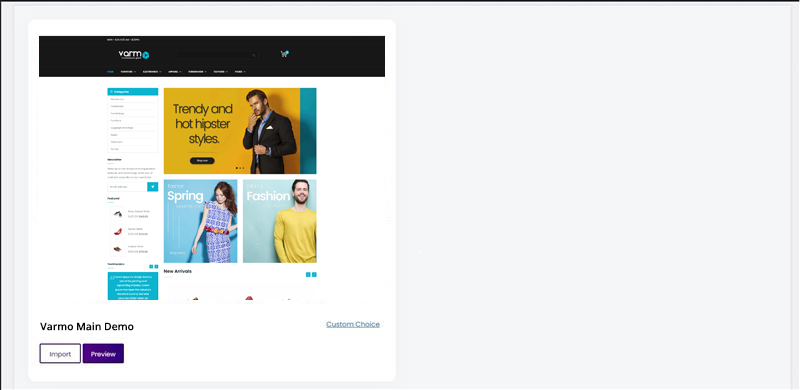
Demo Importer
This allows you to quickly set up your theme with One Click. We have also included the exported XML file with our demo, The XML file will give you all of our demo pages...
Install & Activate all required Plugins before the demo import.
To import the demo go to Theme Panel (WP Dashboard) > Varmo > Demo Importer.
Whole Demo Site Content
Demo import will enable you to import all media files, pages, theme options, and plug-in settings.
In case the demo data installation is stuck, you can manually install it by downloading the demo.zip archive from the theme package and extracting it from your Theme's folder root directory. If the issue persists, please contact your hosting service provider to make sure that your server configuration meets the Theme Requirements. Otherwise, please refer your request to our support center.
Only Pages, Forms & Sliders
When choosing the partial demo data import, the new content will be added to your existing data. Although this will not overwrite your existing content, we still recommend backing up your website before doing this.
How to Demo Import by Manual?
Step-1
Theme Installation: Admin Dashboard –>> Appearance –>> Themes –>> Just activate our theme.
Theme Name: Varmo
Plugin Installation: Admin Dashboard –>> Varmo –>> Theme Plugins –>> Install and Activate All required plugins.
Plugins –>> Add New –>> The Plugin name is “Widget Importer and Exporter” have to install and activate this plugin.
https://wordpress.org/plugins/widget-importer-exporter/
Manual Import Files: All files you get from Envato market, click and download like the below image.
- 1. theme.xml
- 2. widgets.wie
- 3. theme-options.json
- 4. custom-sidebars.json
Step-2
Theme Options Import:
Just open the theme-options.json file copy the text and paste it to
WP Dashboard > Varmo > Theme options > Import/Export > Import > paste > Click import. Save theme options.
Step-3
XML Import:
Ready to all import files.
In the admin dashboard, You can find Tools > import > WordPress > Run importer > Choose upload theme.xml file and to import.
- 1. Import author: technology (technology).
- 2. Import author: zozothemes (zozo_newser_user).
After, here you can choose your username and both are the same.
All are a must like the below images.
Click the Submit button.
Step-4
Create Custom Sidebars:
You can edit the custom-sidebars.json file with any text editors( ex: notepad, notepad++, and sublime editors).
Admin Dashboard –>> Varmo –>> Custom Sidebars –>> Add Sidebar( Here you can create your custom sidebars).
You can create one after another.
Follow the below images:
Widgets Import:
For widget import plugin:
In the admin dashboard, You can find Tools > Widget Importer and Exporter Settings >> Import Widgets and Choose the file with (.wie format) and import your widgets.
Now files are imported, you need to set up some settings manually(menus and front page).
Menus Settings:
Step1: Select a menu to edit: “Primary Menu”.
In admin dashboard >> Appearance >> Menus >> You must select the “Primary Menu” like the below image.
Choose Your Front Page:
In admin dashboard >> Settings >> Reading >> Reading Settings >> A static page (select below) >> Home Page (Select your home page).
Custom Fonts
- WP Dashboard >> Varmo >> Custom Fonts
- Choose File & Upload your Font
- Custom fonts should be in the following format. .eot, .otf, .svg, .ttf, .wof.
- The folder name and font name should be the same. but the font name should be like a slug.
- Eg: The Font folder name is – 28 Days Later font name like 28-days-later.eot, 28-days-later.otf …